Skill Level
You should already have access to the Account Settings at admin level.
What will I learn?
This article gives instructions on how to use the settings for better management of your Account Data Structure.
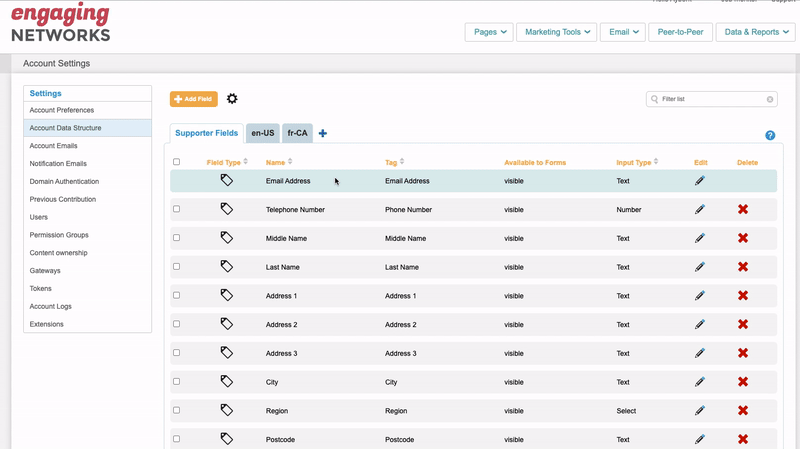
All supporter information (email, name, surname, city, age etc.) is stored in your account based on the fields and tags that are created in your account. You can adjust or modify the data structure by using the gear button on your Account Data Structure page.
If you need to learn more about Account Data Structure please read this article.
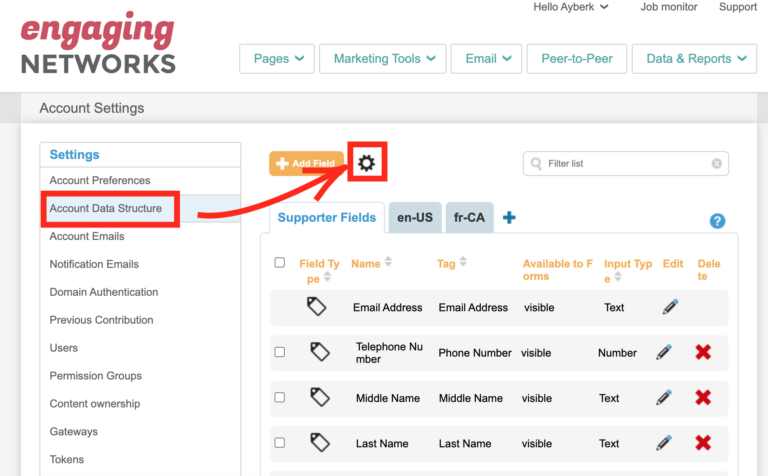
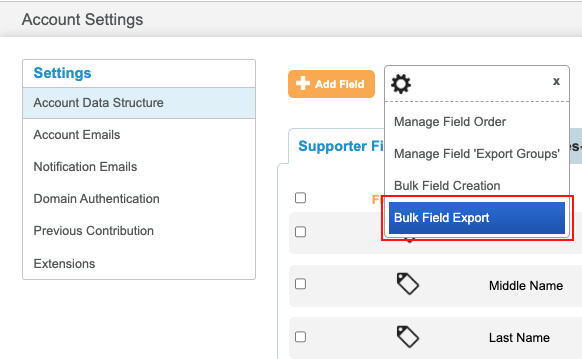
To access the panel, navigate to the Account Data Structure section. Go to Hello YOURNAME > Account settings > Account Data Structure. Then click ⚙️ Gear icon next to the “Add Field” button. A box will appear with the list of options.
From the box that appears, you will be able to:
- Manage Field Order
- Manage Field “Export Groups”
- Bulk Field Creation
- Bulk Field Export
Manage Field Order
When you export supporter data, the data will be sorted according to the existing field order by default. However, you can change the default field order by using the “Manage Field Order” feature.
To sort data, simply click on the gear icon next to the “Add Field” button, then click on the “Manage Field Order” from the dropdown menu.
You can easily sort your fields by drag and drop depending on your priorities.
Manage Field “Export Groups”
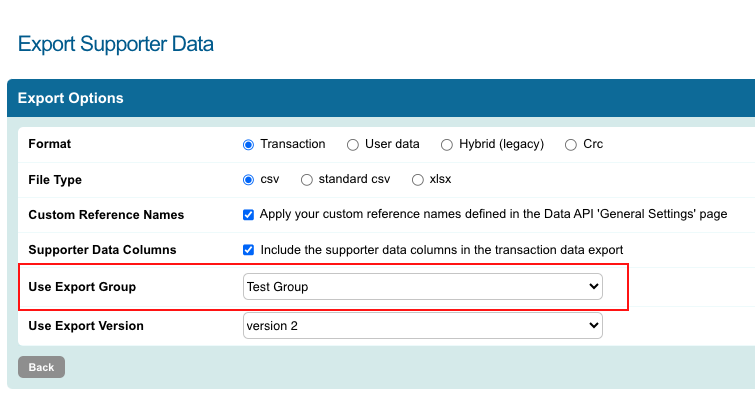
In your Engaging Networks account, when you export your supporter data, you are asked if you’d like to prefer a specific export group for your downloadable file. You can define custom “export groups” in order to control which data columns appear in your exported files. “Export groups” can be used either when exporting supporters manually, via the query builder, or through the export API.
From Data Structure settings, you can either create a new Export Group or modify the existing ones.
To do that, simply click on the gear icon next to the “Add Field” button, then click on the “Manage Field Export Groups” from the dropdown menu.
When you click “Manage Field Export Groups”, a pop-up will appear which shows all available export groups in your account. From that screen, you can edit your existing Export Groups or you can create a new one.
Create a new Export Group by clicking the Add Group button at the top of the screen.

If you do that, a new box will appear instantly, so you can give a unique name to your new export group and select the fields that you want to see in your exports. This enables you to personalize the exported data according to your preferences.
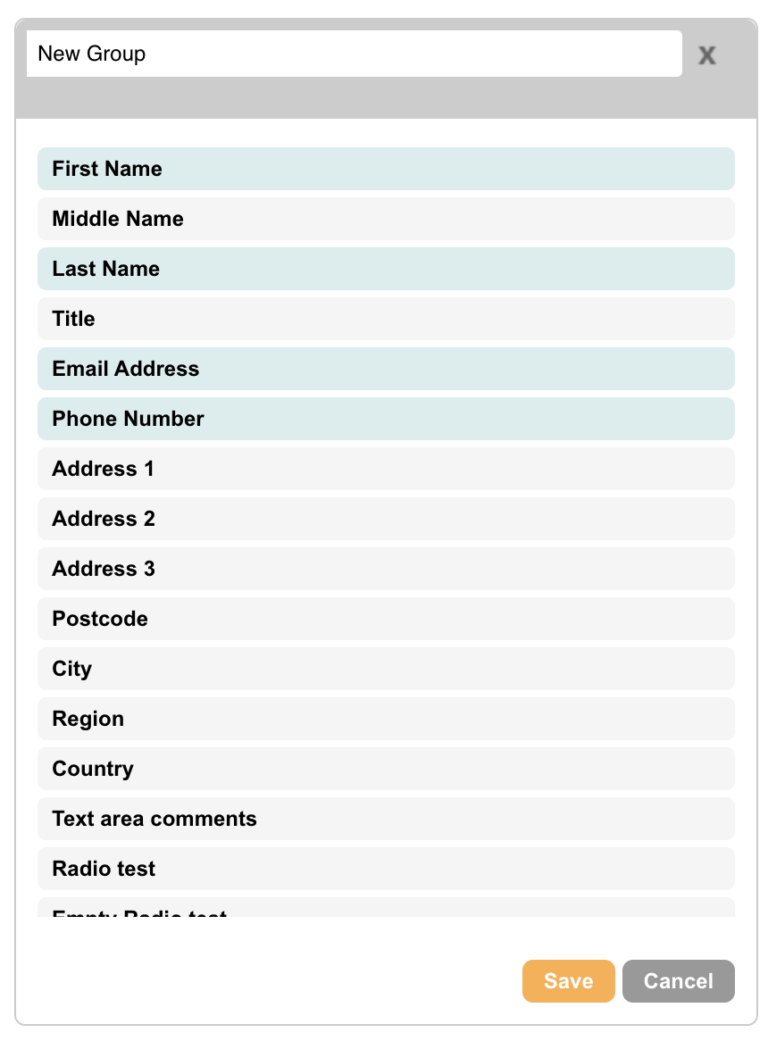
Remember that the new Export Group will be available for using when you export supporter data.
Bulk Field Creation
If you want to create multiple fields at once, you can import your file by using the Bulk Field Creation feature in the settings. In order to do that, you must prepare your file using the standard column names specified in the sample guide provided by the system.
After you click the Bulk Field Creation button, on the pop-up screen you will be able to download this sample guide for your own use.

In the sample guide, you will see 7 columns in order from left to right: Field, Tag, Visibility, Type, Label/Value, Split Values 2, Split Values 3, Split Delimiter.
Field: You can name your field anything you want.
Tag: You can use pre-defined tags or leave it as Not Tagged.
Visibility: You can decide whether your field appears in the forms or not (visible, NOT visible).
Type: You can define your field type (text, textarea, select, radio, checkbox, password, split text, split select, radio with input, select with input, uneditable text, triple text, triple select, calendar, hidden, email, number, telephone, image select, range, rating).
Label/Value: You can define respective values for the fields.
Split Values 2: You can define the second values for your field if it has split values.
Split Values 3: You can define the third values for your field if it has triple values.
Split Delimiter: You can define your delimiters for split values. ( / – , . | )
When your file is ready, in the next step you will be able to import it. Next, you will be asked for confirmation. If all fields are named correctly, your file will be imported successfully. Then the new fields will appear in your account.
Please remember that you can not update the existing fields through this method.
Bulk Field Export
On the Account Data Structure page, if you click the Bulk Field Export button from the dropdown list, a .csv file will be downloaded onto your device instantly.
In this file, you will see all existing fields in your data structure including the fields you created by yourself.